Showing posts with label Modern Irish Bee. Show all posts

Wednesday, 1 October 2014

Modern Irish {Scrappy} Bee: October Blocks

Hi I'm Tomomi, hive mama for October! This is my very first to do the quilting bee actually so I am very very looking forward to what I am going to get from you ladies!  After nine month going through everybody else blocks, I was bit worried somebody may come up with the same idea as mine. But you didn't! So here you go!

I would like to have bookshelf blocks please :)

My idea came when I saw this beautiful room.  We moved the house last November and got rid of a lot of books but still we have a lot. Yes we are a family of book worms. And now I want to have a book shelf quilt too.  There are some variation of them if you google it, but since this quilting bee is working with scraps, I want to make something like this or this or this.

I like being organised and my book shelf to be organized by genre. To do so, I would ask you to have a theme for each blocks you make. Grown up section, old books, pop section, Jane Austen  section, future section, exotic, or whatever your books collections are. Just no kids section please. Pretty section, maybe.
Only fabric I wouldn't want for the books are whites or very pale unless some bright pattern on it. I am going to ask you to use Kona Ash for the background, so if you can use anything brighter or darker than it, it's fine.


Blocks size : 12.5” H and about 12.5” W. I need you to make them 12.5” high but the width can be between 11” and 13”. I will explain why later. And two blocks please.

How to make blocks.
The short tutorial
Cut up the scraps of fabric for book parts between 2.5” - 1” wide and 6.5” - 11.5” long. Add the necessary length of the Kona Ash as a background fabric on top of each strips to make them 12.5” long altogether.
Fold the seam allowance to the book side together so the book gets some lift from the background.
Stitch all the strips together to make a block about 12.5” wide. You don't need to make them exact 12.5” wide, shorter or longer, both fine.

Please vary the hight of books especially neighbouring ones, means don't put similar hight books next to each other. And wide colour variation please.

The step by step tutorial.
Cut up the scraps of fabric for book parts between 2.5” - 1” wide and 6.5” - 11.5” long. Lay them in order you like with 0.5” overlapping.


Measure and make the total width around 12.5”. I made mines a bit longer to be on the safe side because I usually end up too short.


 Cut one Kona Ash 2.5” wide strip for the background. Measure the length of book strip which is 2.5”, say that was A”. Cut the Kona Ash strip to (13 -  A)” long and stitch it on top of the book strip. That should make the strip 12.5”. Do the same to all the 2.5” books.


Slice the left over 2.5” Kona Ash strip or cut new one to the same width as the next widest book strip. Repeat as above. And proceed to the narrower books. In this way,I Think you don't end up with too much Kona Ash scraps.

Fold the seam allowance to the book side together so the book gets some lift from the background.
When all the books has background attached on the top, stitch them together.  Please verify the hight of books especially neighbouring ones, means don't put similar hight books next to each other. And wide colour variation please.

Alternately, you can make them with this measurement.
Book strips; 2.5” *10.5”, 2.5”*6.5”, 2”*10”, 2*10.5”, 2”*11.5”, 2”*7.5”, 1.5*8.5”, 1.5*7.5”
Background Kona Ash ;  2.5” *2.5”, 2.5”*6.5”, 2”*3”, 2*2.5”, 2”*1.5”, 2”*5.5”, 1.5*4.5”, 1.5*5.5”


I wrote them in order to go together, so don't mix them up! Refert to the pic too. When all the books has background attached on the top, stitch them together whatever the order you like.

The picture is sideways for me to draw easily.  All the measurements are seam allowance included.
  
Please contact me if you find something wrong or difficult in this tutorial. I will help!

Romance Section

Pop Culture Section


Monday, 1 September 2014

Modern Irish {Scrappy} Bee: September Block

So, no sleeps now until it is my turn to be queen bee in the Irish Modern Quilt Guild Stash Bee. Big excitement, this is my first time in a bee and to be a bee mama. First though I will tell you a little about myself. I have always sewn and knitted, dolls clothes when I was little, my mum and I used to make things together. Then I progressed to making clothes and altering clothes, that's when I was young and slim. When the children were small and knitting went out of vogue, I took up quilting. That was great for ten or so years, but I felt stultified by the quilting rules and it seemed too fussy as my home became more contemporary. In the meantime I discovered my love of genealogy, gardening, scrap booking  and drinking wine. In between times I read books, lots of books, and baked occasionally.

 Eventually I came back to quilting, I love this modern style and the new clean lines of contemporary quilting. (mind you, my house reminds me of  Oscar Wilde's Picture of Dorian Gray - the house has clean lines but the roof space and cupboards are bursting at the seams). I'm in my mid 50s and married a long long time. Our children are all grown up now, my sons (twins) live in the States and in England and my daughter has come home from England. Alan and I have gone from 5 to 3 to 2 and back again to 3.  I am lucky enough to work part time, in a library (books and talking to people - what's not to like?) so have taken up the sewing again.  So that's me, just to add I have loved being part of this online community and watching what you all sew! Now on to the bee.

After much thought, excitement, trepidation and tossing and turning I have decided on wonky crosses. Not too difficult when the school term begins again with all that entails for most of you, and not too difficult for my first tutorial!

I would like you to do 4 wonky cross squares and one teeny tiny wonky cross as a signature square. For this quilt I would like to you use kona (or equivalent) in a strong bright colour.


Think happy :)
Think LOUD
Think bright

For the wonky cross itself, I would like another bright strong colour, a contrast at least, a colour clash would be brilliant. I would prefer, please, no florals for this. I would love circles, squares, lines or a pattern made from strong lines like my pink wee wander trees. The end result will be bright, modern, cheerful. A quilt to make your heart sing. Now for the method.

Cut a 10.5 square of background fabric and make a diagonal cut from the top to the bottom. Take a strip of 1 to 2" wide of your contrast fabric and sew it to each side of the cut. Leave an inch or so of the strip proud at the top and edge the right hand piece of fabric up slightly.


Next make a diagonal cut from left to right (don't do what I did and fold the fabric and cut - it makes and arrow shape, not what we want at all!) Take the second strip and sew to the first bit and then the second. The tricky bit is to keep the two sides matched up. A little sticking in pins and shuffling around helps.


Don't worry about trimming off the squares, I will do it. Obviously the size of the finished square will depend on the width of the cross. When I get them all I will cut them all to size. I would also like you to make me one small square with a 4" square as the base square, and then sign it. If you really feel the love you please feel free to make more than one miniature square!


I first saw this square on the Bee Blessed blog, and I made 4 squares for Judith and Sarah at the time, and I loved how their final quilt turned out. Judith had kindly allowed me link to their tutorial. If you don't already know Bee Blessed they are a great bunch who make quilts for the needy in the community. Worth supporting if you can, and I know lots of us do.

Well, when I first joined this Bee, as a latecomer, in February, the advice I got was "just breathe". I am still "just breathing", have nearly survived my first year, and hope to take part again next year if you'll have me.

Helen x

Friday, 1 August 2014

Modern Irish {Scrappy} Bee: August Block

Hello ladies!  As the other Bee Mamas have said in their posts ...oh man time flies!  So it’s my turn and I hope you like my choice.

I was thinking and thinking and thinking came up with nothing, so I got on to Pinterest and saw this!


Yes it’s a traditional block but I want to have something really colourful and in your face and at the same time an easy block to run up!

Read the next sentence with sincere politeness:  I don’t want Jany batiks, browns, flowerly prints, kiddy fabrics. 

I would like pretty please, bright cheerful colours if at all possible, warm colours.   Again I refer you to Imagingermonkey’s pic for inspiration.

One condition – the centre of the churn dash should be one of your favourite scrappy fabrics. 

Scant ¼” is required for sewing the block in certain parts – I interpreted this as just shy of the ¼” mark on your ¼” sewing foot, so please if you could follow that that’d be great, in other words a breath away from ¼” – apologies if I’m saying the same thing 10 different ways but it’s important, if you are unsure just shout out and please don’t be intimidated about this scant thing.

Two blocks please, no need to trim them.

I used CluckCluckSew’s tutorial to make my blocks.

So to get started:

Select three fabrics – one for your centre piece (this should be one of your favourite pieces), plus two other colours.   If they clash that’s fine, look at Imagingermonkey’s pic, this the kind of look I’m going for e.g. colourful, clashing.


Cut the following:

Centre piece:  1 -  3 ½” square

Fabric  Colour 1:  two 3 7/8” squares

Fabric Colour 1:  one  2”x15” strip

Fabric Colour 2:  two  3 7/8” squares

Fabric Colour 2: one  2”x15” strip


Take a square of Fabric Colour 1 and a square of Fabric Colour 2, on the back of Fabric Colour 1 draw a diagonal line from corner to corner and place face down on Fabric Colour 2.  Pin together.  


Carefully sew a SCANT ¼” along either side of the diagonal line, so I sewed just inside the ¼” line.  Cut along the pencil line and iron the seam towards the darker of the two fabrics.  Repeat with remaining squares and you should end up with four Half Square Triangles (HSTs).   If in doubt refer to Cluckclucks tutorial.  Trim to 3 ½”


Next take your two strips of fabric – right sides together, sew normal ¼”.

Iron seam to darker fabric.  Apologies for the different coloured fabric (this is my second block colours, but I forgot to take a pic). 

Cut this strip into 3 ½” squares, you will be able to cut 4 squares in total.


Now the fun part, layout your pieces.  Make sure the colours are in the right order, sew the pieces into three rows.   When pressing your seams of each individual square i would recommend pressing the seams on Row 1 to the leave, Row 2 to the right and Row 3 to the left again, this way the slot in nicely.  Any questions email me.


You should have a lovely colourful block, 9 ½” unfinished, don’t trim I will look after this.

So thank you for your time in making these blocks and I look forward to receiving them!

X

Fi

Tuesday, 1 July 2014

Modern Irish {Scrappy} Bee: July's Blocks

I can’t believe it’s July already and my turn to be Queen Bee. This is the first time I have taken part in a Bee so I thought by picking July I would have plenty of time to be organised. Then the universe laughed and laughed, and here I am the night before holidays knee deep in packing writing my first ever blog post. I have really enjoyed making all the different blocks and trying new patterns for the ladies so far this year. There are going to be some spectacular quilts! My pile of scraps doesn’t appear to be getting very much smaller though the list of quilts I want to make is getting longer….. I have changed my mind so many times about which block I would like but finally chose this one. It’s pretty simple as blocks go but I love the effect. I would like you each to make eight 6.5 inch square (unfinished) string blocks. This tutorial by Sherri McConnell is very easy to follow (though note she works off a larger block size). Once you have your strings prepared they only take minutes to put together. In keeping with our scrappy theme these can be as colourful and scrappy as you like. The only stipulation I have is that the centre strip is a happy colourful selvedge. I hope you have some lying around. I’m not a huge fan of batiks and civil war type colours but other than that anything goes. Linen mixes etc are fine. If you want to add other selvedge strips into the block too that’s cool as well.

  DSCN1718 

Your foundation fabric can be any scrap cotton fabric you have as it won't be seen. I used part of a sheet I had cut up for another project.

  DSCN1717 

 I found it helpful to start by drawing a line down the centre diagonal of the foundation block, then another ¼ inch from the centre line. It's quite faint but it's there in the photo. Or you can live on the wild side and wing it- it's that kind of block.

  DSCN1719

I lined the edge of my selvedge strip along this line as my starting point.

  DSCN1720 

 Then just keep adding strings as shown in the tutorial. Press and trim.

  DSCN1722 

 And there you have it- a nice summer evening project.

-Fiona

Monday, 2 June 2014

Modern Irish {Scrappy} Bee: June Block

And it's June already! If you knew how many times I've been changing my mind with my block design… But I must thank Cindy who gave me the little push I needed to stick to my original plan. This is how it happened: back in January I started to look around Google Images for inspiration on "modern quilts", I looked through all my quilting books and magazines, admired the most amazing scrappy blocks and quilts on other blogs… and then I saw one that caught my eye on Flickr, this "Confetti Quilt" had what I was aiming for. All those bits of scraps scattered randomly on a plain background.

"Confetti quilt" by Threekitchenfairies

The second round of inspiration came when I was flicking through a book about the Solar System and saw photos of Supernova Stars. Something more or less like this:

photo from wyalusing.org

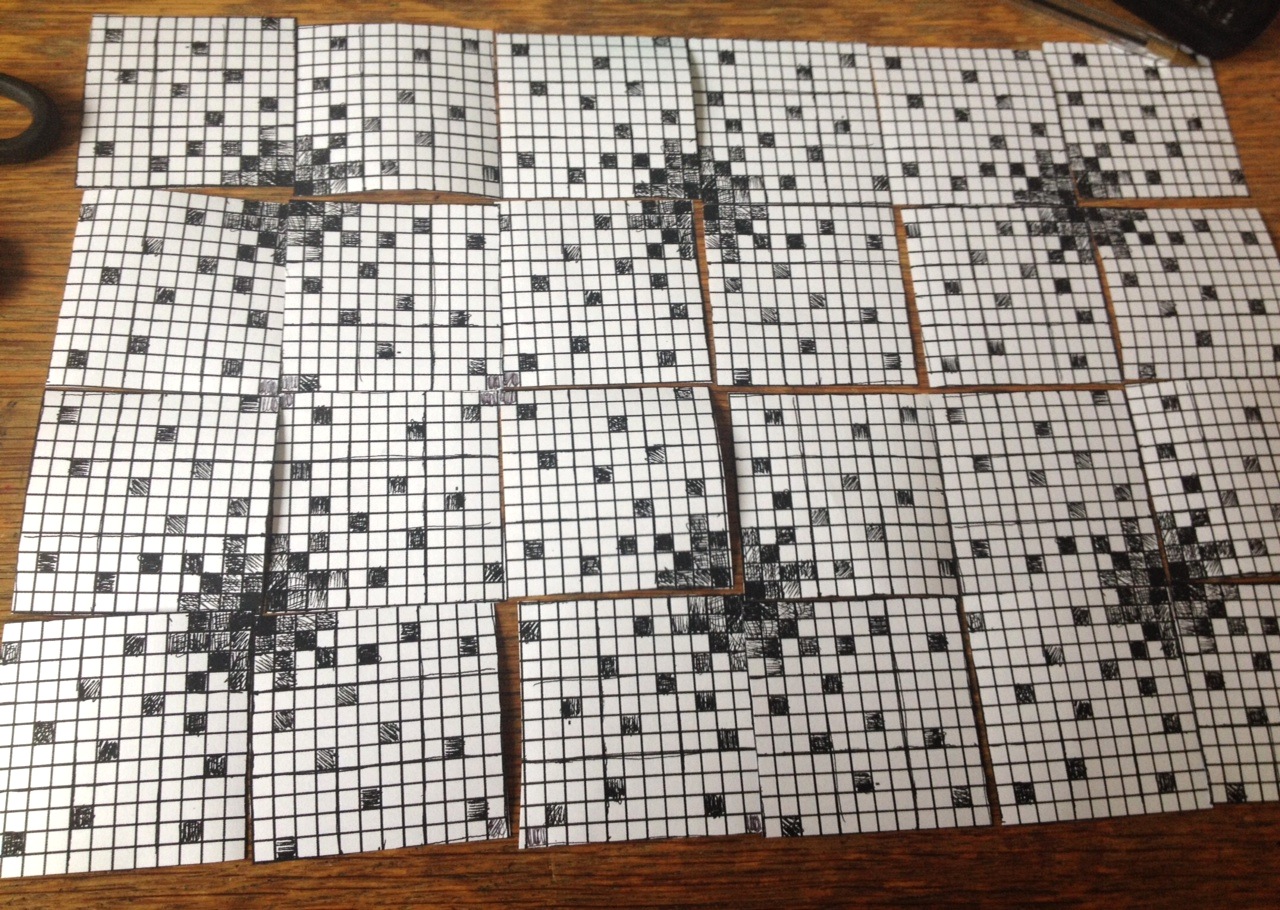
So that's when I started to sketch some blocks on graph paper until I came up with a block that had random patches like the confetti quilt and a become a Supernova star cluster when pieced together with three more blocks. I imagine my quilt like this:

photo 1 copy 4

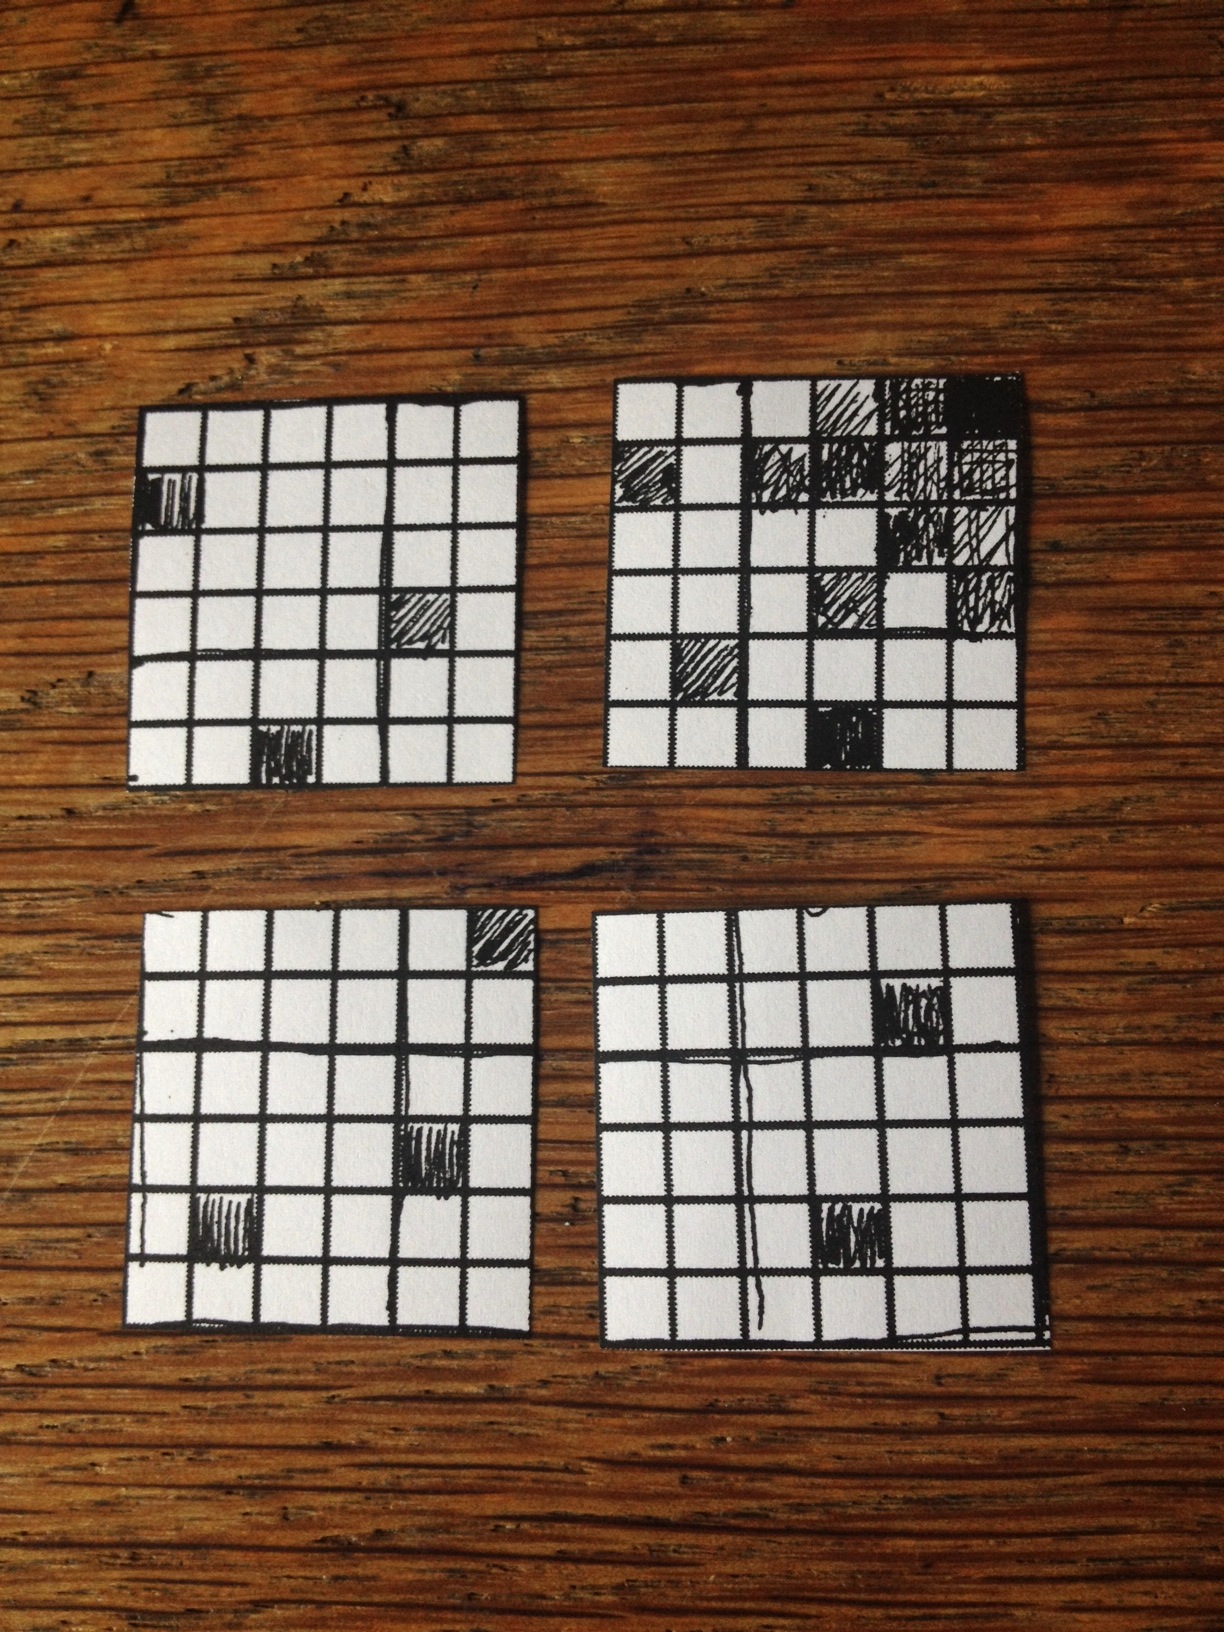
Please don't panic! (that's why I changed my mind so many times, I was afraid it would be too complicated!). But I've managed to simplify the pattern. If you look closely, the block is divided into four squares, and each square can be divided in 3 columns…

photo 2 copy 5

photo 3 copy 3

photo 4 copy 2

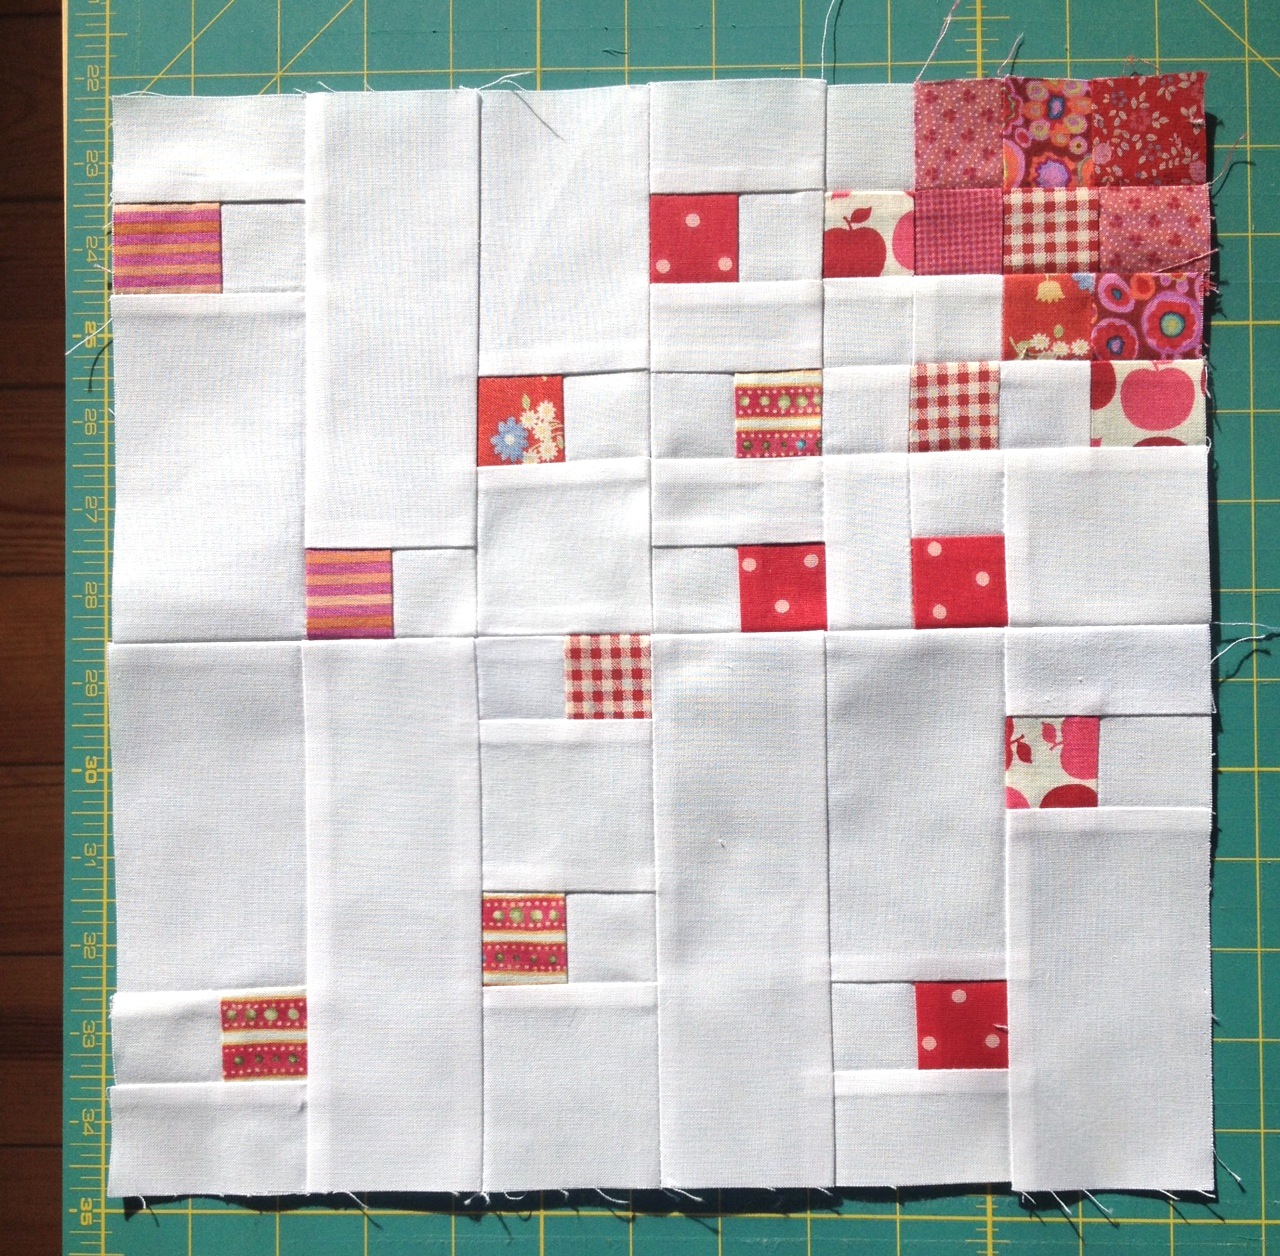
Here's the two blocks I've made, which would be half a star…:

DSC_0747

It requires a bit of organisation when cutting, especially the white background, but once you have everything ready, the instructions are pretty straight forward. I'd say it takes about an hour to make one block, but I will ask you for 2 hours of your precious time to make two of them, please don't kill me…

photo

I would like you to use Kona white for the background and a range of red scraps (light, medium, dark), you can include a bit of pink and burgundy, but the main colour is red. One or two dark squares placed at the corner, where the centre of the star would be and the rest can spread out between medium and light. I don't mind if they have a hint of white or any other colour as long as it doesn't take over, since the squares are only 1".

I have written the instructions in PDF format, there are 5 pages but that's because the diagrams (tables really) take up most of the space. I so wish I could use a proper software for writing quilt patterns! but I'm hopeless with computers…

I hope you like it. There is no rush at all and I'll be happy to help if you have any questions. Thank you!

Tuesday, 1 April 2014

Modern Irish {Scrappy} Bee Blocks: April


Happy April Fools' Day!

I contemplated all sorts of sewing-related mischief for my first day of being Queen Bee for April, but I'd be easily identified as the quilty party (groan lol) ;)

At this stage, we've had three really different blocks to create, I'm really looking forward to seeing the resulting quilts, they're going to look FAB! I have spent ages thinking about what I wanted from my month, and I've changed my mind a number of times. Then it hit me, something that reflects me and my reason for quilting: crazy, happy, fun, sharing, variety.... What suits that better than a collaborative quilt made up of improv blocks! My inspiration comes from these blocks:


As you can see I love bright, bold colours, and neutrals/low volumes that make them pop. Aneela Hoey has a great tutorial to give you an idea of how to approach it. It's simple, you start with a fussy cut piece with 5 sides, and clockwise stitch on pieces of fabric longer than the sides. Every so often, whip a chunk off a corner to take away the 'straight lines' of the blocks. The tutorial can be found on Aneela's blog, Comfort Stitching, the only difference is I don't want the blocks colour-coordinated.
For my blocks:


  • Two 12.5" square blocks - for these, just keep going until you reach a size you can trim to 12.5" square :)
  • No batiks or heavy, dark florals
  • Please use cotton or cotton-linen blends.  No poly cottons.
  • Fussy cut centre piece and positioned off-centre
  • If you really felt inclined, the centre piece could be Kona Ash, with an embroidered motif or applique, but it's not a requirement.


  • I hope you enjoy these blocks, I know I loved making mine, and can't wait to get them all together into one quilt that will make me smile whenever I see it/snuggle up in it! One thing's for sure, this is a truly scrap-busting block!

    Anna

    Saturday, 1 March 2014

    Modern Irish (Scrappy) Bee: March Blocks

    I can't believe it's March already! The months seem to be flying by and it's fabulous to be properly into Spring now.


    It's Sarah here, queen bee for March and I have a great, fun block for us to make this month which I hope that you will enjoy making. It's hard to follow Cindy's great spool blocks but I'll try!

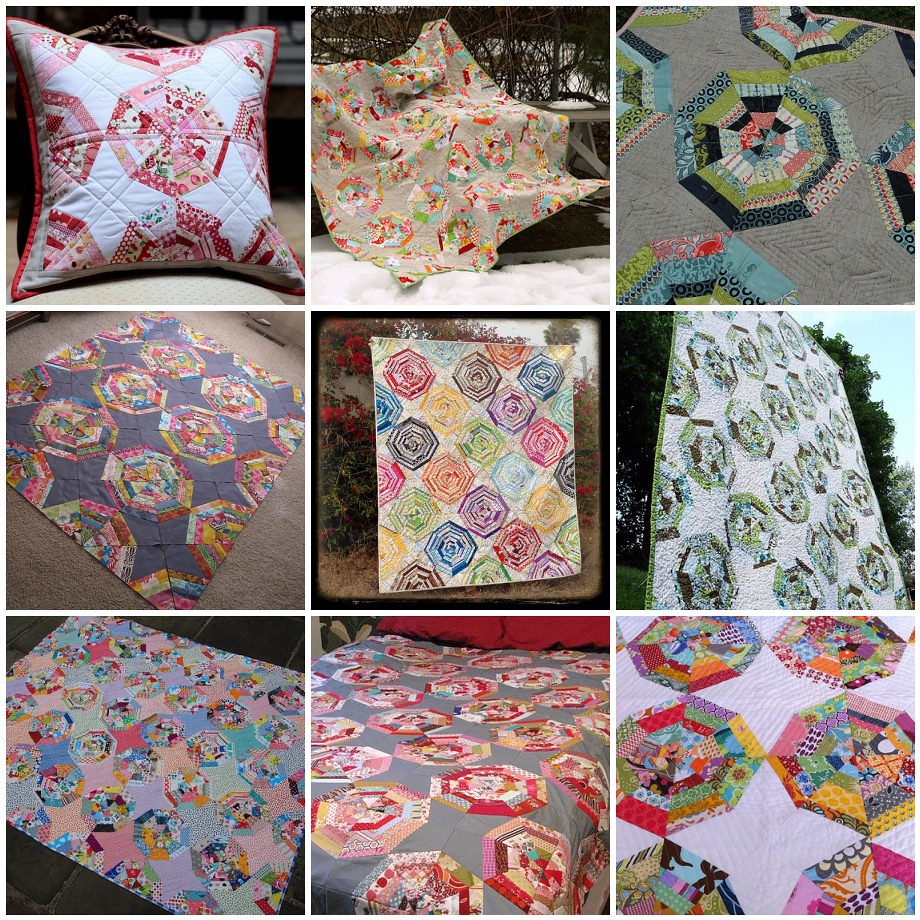
    For the longest time, I've been looking at Spiderweb quilts in total envy....I love how they look. Here's my inspiration mosaic:

    Spiderweb inspiration

    There are quite a few varying spiderweb block tutorials out there but I like this one by Heather best and that's the one we are going to use. Instead of paper, it uses fabric squares as the base which I think makes it much easier to work with.

    The look I am going for is bright, vibrant scrappy string webs against a low volume background. You will need 2 x 12.5" fabric squares for background and a variety of strips of fabrics in widths from 1.25" - 2.5" for the spiderweb parts.


    For the fabric background squares, I would like you to use a grey based low volume print if you have them. If you're not too familiar with low volume, its basically quiet, muted tones, like in the picture above rather than bold, saturated colours and prints. Hopefully you will have something similar in your scrap baskets, enough for the 2 x 12.5" square. Texty prints with small black writing are fine too like the bottom print above, but nothing where the lettering stands out very dark against the background please. If you don't have any grey low volume, please use Kona Ash which will tone in nicely. These will form the central stars in the blocks.


    For the spiderweb strips, I chopped up a heap of scraps in advance, and then as I went along I added a few extra bits depending on my colour combos. For the strips, please use bright fabrics in strong, saturated colours, with a variety of tones and values of colours featuring if you can manage it. No batiks please! A few pale/pastel shades are fine mixed in but please don't have too many. Likewise, a few dark prints mixed in will give great depth, but not too much brown or dark grey or navy etc or it will overwhelm it. Please use a variety of widths in each star point, and the thickest should be 2.5" cut (2" finished).

    Once you've prepped your fabric, you'll be ready to start. The first step is to cut your blocks into 4 triangular quarters and mark them for sewing. Heather's instructions are great and really easy to follow so I hope you won't have any problem. But a word of caution - you really need to look at the pictures carefully before marking your fabrics because the markings do NOT join the dots as you might assume (i.e. as I did. Doh). So make sure to pay attention! I used a water soluble marker to mark mine, a pencil would work just as well on the grey fabric. This is what your four quarters should look like when you are done marking:


    Once you have the marking done, you're ready for the fun bit - picking and sewing your scraps. I would really like if for each of the blocks, you keep the first strip on each side to be in bright, strong print of the same or similar colour families (but not the same print for each one) for each of the triangles in that block. In my sample block I used red/pink fabrics for each of my first strips, as you can see below.


    This will have the effect of picking out the secondary pattern of star shapes on the quilt when it's done. You could use a single colour, or a combo like pink/purple, aqua/blue, yellow/orange - whatever takes your fancy really, pick a different colour/combo for each block.  These should be prints that pop against the low volume background :-)

    When you start to piece it looks all messy - mine did anyway! Be sure to flip back the low volume bit underneath, as per the tutorial, and chop it off when you are done. This will leave you with some scraps from your low volume squares.


    For the first press, be sure to use a dry iron so as not to distort your nice seams. Once I set the seams, I then pressed (not ironed) with lots of steam to make it look all nice and crisp and ready to trim.

    Your finished triangles should look like this:


    Once you have your 4 triangles done, play around with the layout till you are happy, then sew together.

    When you are sewing up your block, please make sure to match and pin the seams where the strips start on each block so the star shape matches up nicely.


    I found it easiest to press my strip seams to one side - mostly in the direction of the star point - and then to press my joining seams open, the block laid flatter that way, but I'm not terribly bothered so do what works for you :-)


    I pinned the last seam heavily to keep all the points matched up and hey presto, it was done! The tutorial says to trim to 12" square, but mine came out slightly short of that measurement for some reason, so please don't bother trimming, I will do that myself. I really love this block and I hope you have fun making it.


    Any questions, let me know!

    Saturday, 1 February 2014

    Modern Irish (Scrappy) Bee: February Blocks

    Happy February, Modern Irish Bee buddies!  I hope you had fun making Ruth's blocks.  They were really fantastic scrap busters, weren't they?  I can not wait to see what her finished quilt top looks like. It is going to be a stunner!

    It's Cindy here, queen bee for the this (very short) month.  If you follow my blog, you know I have been slightly obsessed with spool quilts for nearly a month now.  I have finally found an online tutorial for spools that I adore, so I hope you will join me in making a few blocks over the coming weeks.


    I ask you to use Kona White for the background and then somewhat monochromatic fabrics for the spools.  You can see I took "monochromatic" quite liberally in my test blocks above, but you get the idea.  I ask for bright, cheery modern-type fabrics preferably with only medium or small spools in brown (there's a place for brown...I know...). No batiks or civil war-type fabrics.  They're not my thing.


    There will be four colors of Aurifil spools in the final quilt: Kona Tangerine (orange), Kona Red (well, for red), Kona Medium Grey (you get the idea) and Kona Kiwi for green.  A parcel including including a F8th of one spool color is on its way to you right now.  A F8th should be more than enough for you to make your blocks, so send back any scraps you have greater than 2.5 inches square.  I can use that to finish the quilt off.  Please let me know if you need more spool fabric.  Cutting mistakes happen :)  


    The tutorial is more of a set of cutting instructions than piecing instruction.  The blocks are quite straight forward and direct to piece, but if anyone has problems getting from their cut fabric to the finished block let me know and I will happily go through it with you. 


    Now, how many of these weirdo shaped blocks will I ask you to make?  I did a bit of figuring based on the surface area of two 12.5 inch square blocks.  Here are two possible options that are equivalent size-wise to traditional blocks:

    Option 1: 
    1 large spool
    3 medium spools
    5 small spools

    OR

    Option 2:
    0 large spools
    5 medium spools
    6 small spools

    Depending on your stash, one option might suit you better than the other.  I do not mind which you choose.  Hive buddies, I hope you have fun making these blocks.  I am very excited to see what you create.  Thank you for taking part in making my next quilt :)