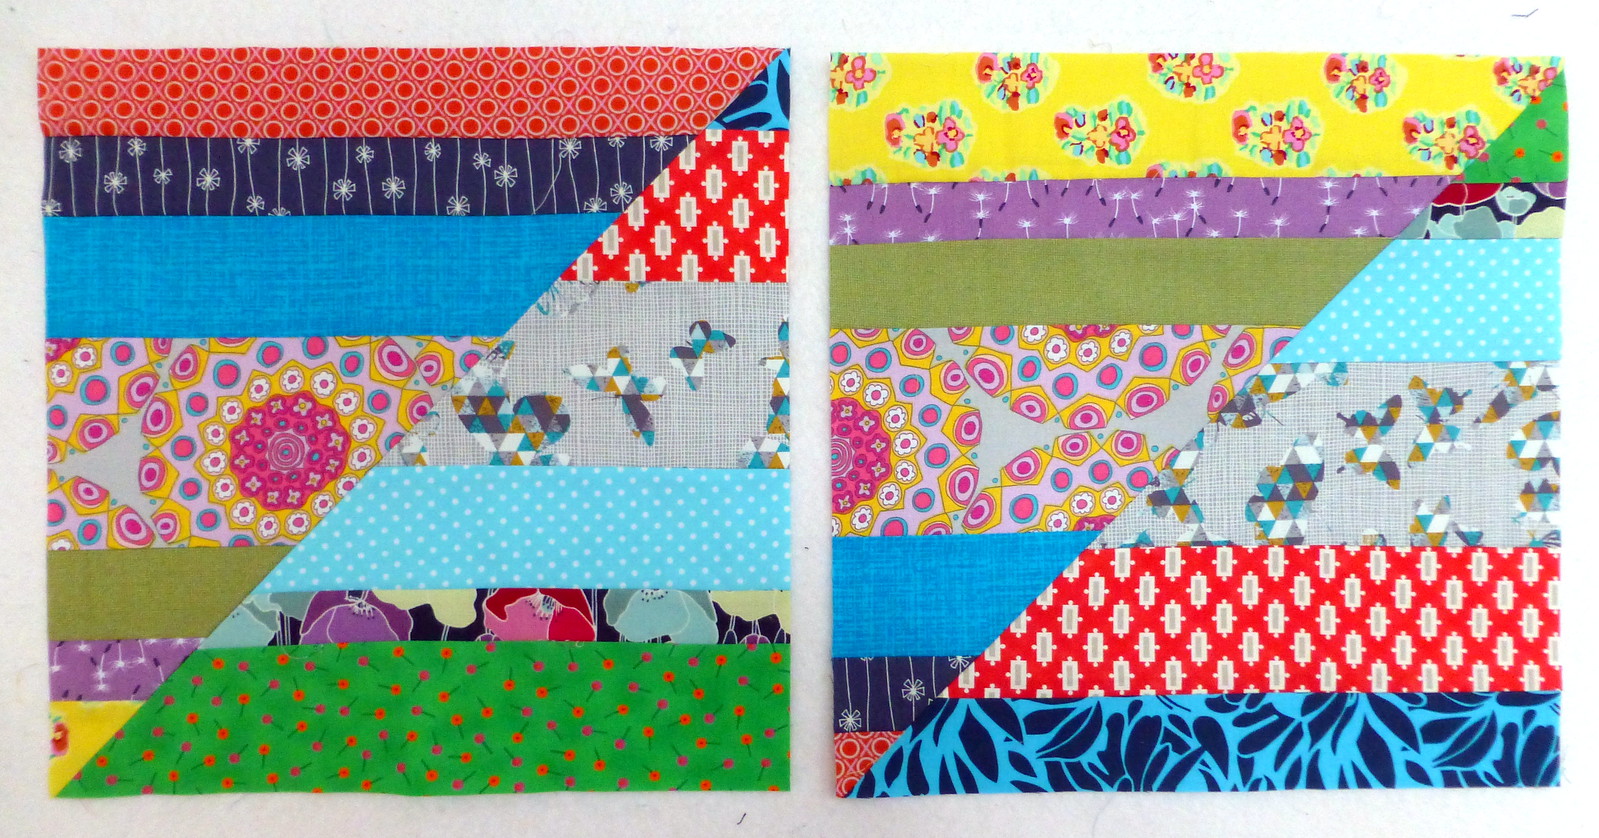
This month's Bee Blessed block is a scrap busting, strip block. For October's block Sarah and Judith are looking for Scrappy Stripey Triangles (try saying that 3 times real fast!). Judith's blocks below have a vibrant happy look to them and they are easy to make.
Block Instructions can be found on Judith's blog here this month.
-Ruth
Showing posts with label block. Show all posts
Showing posts with label block. Show all posts
Thursday, 9 October 2014
Monday, 15 September 2014
Dutch Rose {Swoon} Blocks
Some of the posts I’ve been writing for the blog have involved explorations of techniques (Half Square Triangles) and traditional Blocks (Log Cabins) used in a modern way and while brainstorming the next item I couldn’t get the 8 pointed star block we all know as Swoon out of my head. Some people are all Swooned out and anyone who makes this 80” x 80” quilt deserves a lie down! The popularity of this block though goes back a long way.
While watching Camille Roskelly’s class on Craftsy Pre-cut Piecing Made Simple, I learned that her famous Swoon pattern comes from a traditional Block called the Dutch Rose. Camille found it in an antique quilt, resized it up to a 24” block and simplified the piecing to make it from squares, half square triangles and flying geese.
Traditionally this block is made with diamonds and Y seams and lives in catalogues under the 8 pointed stars with 45 degree diamonds sections! Barbara Brackman has it listed in her Encyclopedia of Pieced Quilt Patterns as the Rolling Star block from 1932 (page 461 if anyone has this book. You can buy a digital copy from the American Quilter’s Society here).
Jinny Beyer in her book The Quilter's Album of Patchwork Patterns: More Than 4, 050 Pieced Designs for Quilters has the Dutch rose listed by the Ladies Art Company in 1897, making this design 117 years old! Not quite what you would call modern though in modern fabrics it just shines, doesn’t it?
My favourite that I found in my exploration is a Double Dutch Rose paper pieced pattern by Piece by Numbers. Definitely on my list to make!
A modification to the four corners of this block gives you the Star of Bethlehem from 1938 also called Jewels in a Frame and the Star of the Magi (ref. Jinny Beyer book above) and the Patterns from History website states there are 14 different star designs that use the Star of Bethlehem name including this one!
Whatever version you choose or whatever name you choose to call them these 8 pointed star blocks are hard to resist. Moda has chosen a simplified version that can be made from Layer cakes (72”) Charms (32”) or mini-Charms (12”) and have given the pattern away for free here. There is a blog hop going on at the moment to showcase new Moda fabrics for Autumn/Winter here if you want to see some lovely versions of this block. I really like this one at Fresh Figs. The layer cake version seems like a great and quick way to piece a quilt top!
If you have any Swoon blocks or quilts to share we’d love to see them on IG (#modernirishquilters) or on our Flickr or Facebook pages.
-Ruth
Monday, 1 September 2014
Modern Irish {Scrappy} Bee: September Block
So, no sleeps now until it is my turn to be queen bee in the Irish Modern Quilt Guild Stash Bee. Big excitement, this is my first time in a bee and to be a bee mama. First though I will tell you a little about myself. I have always sewn and knitted, dolls clothes when I was little, my mum and I used to make things together. Then I progressed to making clothes and altering clothes, that's when I was young and slim. When the children were small and knitting went out of vogue, I took up quilting. That was great for ten or so years, but I felt stultified by the quilting rules and it seemed too fussy as my home became more contemporary. In the meantime I discovered my love of genealogy, gardening, scrap booking and drinking wine. In between times I read books, lots of books, and baked occasionally.
Eventually I came back to quilting, I love this modern style and the new clean lines of contemporary quilting. (mind you, my house reminds me of Oscar Wilde's Picture of Dorian Gray - the house has clean lines but the roof space and cupboards are bursting at the seams). I'm in my mid 50s and married a long long time. Our children are all grown up now, my sons (twins) live in the States and in England and my daughter has come home from England. Alan and I have gone from 5 to 3 to 2 and back again to 3. I am lucky enough to work part time, in a library (books and talking to people - what's not to like?) so have taken up the sewing again. So that's me, just to add I have loved being part of this online community and watching what you all sew! Now on to the bee.
After much thought, excitement, trepidation and tossing and turning I have decided on wonky crosses. Not too difficult when the school term begins again with all that entails for most of you, and not too difficult for my first tutorial!
I would like you to do 4 wonky cross squares and one teeny tiny wonky cross as a signature square. For this quilt I would like to you use kona (or equivalent) in a strong bright colour.
Think happy :)
Think LOUD
Think bright
For the wonky cross itself, I would like another bright strong colour, a contrast at least, a colour clash would be brilliant. I would prefer, please, no florals for this. I would love circles, squares, lines or a pattern made from strong lines like my pink wee wander trees. The end result will be bright, modern, cheerful. A quilt to make your heart sing. Now for the method.
Cut a 10.5 square of background fabric and make a diagonal cut from the top to the bottom. Take a strip of 1 to 2" wide of your contrast fabric and sew it to each side of the cut. Leave an inch or so of the strip proud at the top and edge the right hand piece of fabric up slightly.
Next make a diagonal cut from left to right (don't do what I did and fold the fabric and cut - it makes and arrow shape, not what we want at all!) Take the second strip and sew to the first bit and then the second. The tricky bit is to keep the two sides matched up. A little sticking in pins and shuffling around helps.
Don't worry about trimming off the squares, I will do it. Obviously the size of the finished square will depend on the width of the cross. When I get them all I will cut them all to size. I would also like you to make me one small square with a 4" square as the base square, and then sign it. If you really feel the love you please feel free to make more than one miniature square!
I first saw this square on the Bee Blessed blog, and I made 4 squares for Judith and Sarah at the time, and I loved how their final quilt turned out. Judith had kindly allowed me link to their tutorial. If you don't already know Bee Blessed they are a great bunch who make quilts for the needy in the community. Worth supporting if you can, and I know lots of us do.
Well, when I first joined this Bee, as a latecomer, in February, the advice I got was "just breathe". I am still "just breathing", have nearly survived my first year, and hope to take part again next year if you'll have me.
Helen x
Friday, 1 August 2014
Modern Irish {Scrappy} Bee: August Block
Hello ladies! As the other Bee Mamas have said in their posts ...oh man time flies! So it’s my turn and I hope you like my choice.
Yes it’s a traditional block but I want to have something really colourful and in your face and at the same time an easy block to run up!
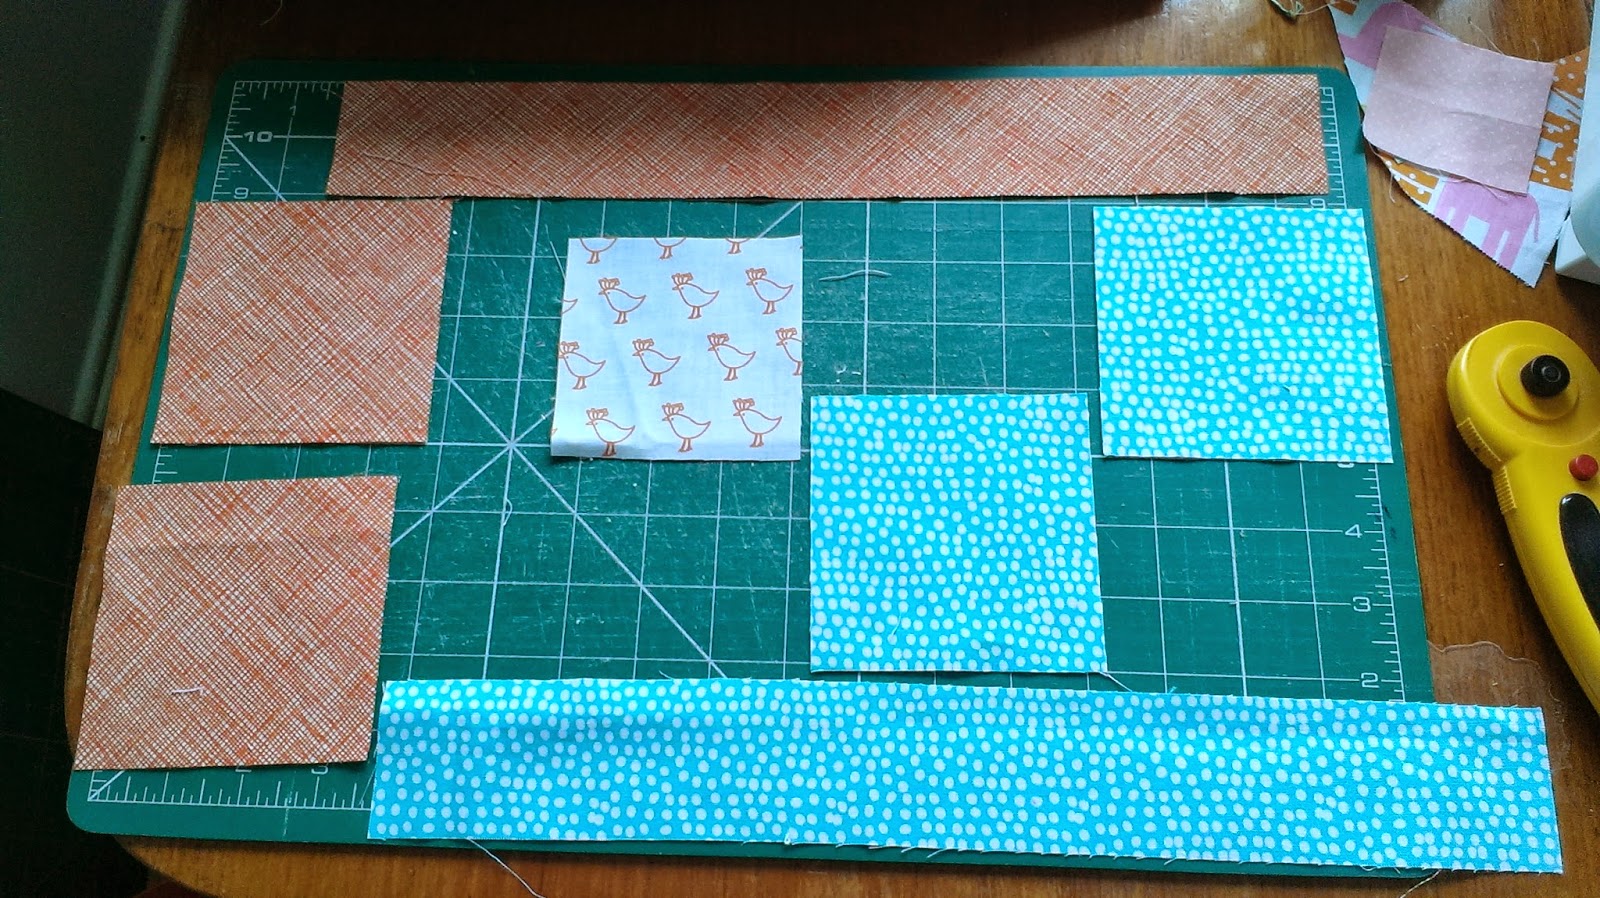
Take a square of Fabric Colour 1 and a square of Fabric Colour 2, on the back of Fabric Colour 1 draw a diagonal line from corner to corner and place face down on Fabric Colour 2. Pin together.
I was thinking and thinking and thinking came up with nothing, so I got on to Pinterest and saw this!
Yes it’s a traditional block but I want to have something really colourful and in your face and at the same time an easy block to run up!
Read the next sentence with sincere politeness: I don’t want Jany batiks, browns, flowerly prints, kiddy fabrics.
I would like pretty please, bright cheerful colours if at all possible, warm colours. Again I refer you to Imagingermonkey’s pic for inspiration.
One condition – the centre of the churn dash should be one of your favourite scrappy fabrics.
Scant ¼” is required for sewing the block in certain parts – I interpreted this as just shy of the ¼” mark on your ¼” sewing foot, so please if you could follow that that’d be great, in other words a breath away from ¼” – apologies if I’m saying the same thing 10 different ways but it’s important, if you are unsure just shout out and please don’t be intimidated about this scant thing.
Two blocks please, no need to trim them.
I used CluckCluckSew’s tutorial to make my blocks.
So to get started:
Select three fabrics – one for your centre piece (this should be one of your favourite pieces), plus two other colours. If they clash that’s fine, look at Imagingermonkey’s pic, this the kind of look I’m going for e.g. colourful, clashing.
Cut the following:
Centre piece: 1 - 3 ½” square
Fabric Colour 1: two 3 7/8” squares
Fabric Colour 1: one 2”x15” strip
Fabric Colour 2: two 3 7/8” squares
Fabric Colour 2: one 2”x15” strip
Take a square of Fabric Colour 1 and a square of Fabric Colour 2, on the back of Fabric Colour 1 draw a diagonal line from corner to corner and place face down on Fabric Colour 2. Pin together.
Carefully sew a SCANT ¼” along either side of the diagonal line, so I sewed just inside the ¼” line. Cut along the pencil line and iron the seam towards the darker of the two fabrics. Repeat with remaining squares and you should end up with four Half Square Triangles (HSTs). If in doubt refer to Cluckclucks tutorial. Trim to 3 ½”
Next take your two strips of fabric – right sides together, sew normal ¼”.
Iron seam to darker fabric. Apologies for the different coloured fabric (this is my second block colours, but I forgot to take a pic).
Cut this strip into 3 ½” squares, you will be able to cut 4 squares in total.
Now the fun part, layout your pieces. Make sure the colours are in the right order, sew the pieces into three rows. When pressing your seams of each individual square i would recommend pressing the seams on Row 1 to the leave, Row 2 to the right and Row 3 to the left again, this way the slot in nicely. Any questions email me.
You should have a lovely colourful block, 9 ½” unfinished, don’t trim I will look after this.
So thank you for your time in making these blocks and I look forward to receiving them!
X
Fi
Monday, 28 July 2014
Variations on A Theme
Remember all those Half Square Triangles I made when exploring different ways to make them? I thought I would open a challenge today to show that we modern quilters love traditional blocks just as much as modern blocks. How many of these 16 blocks can you name?
Or number 15 in this last set as a whole quilt? I think this is my favourite in the whole bunch! What's your favourite HST block?
- Ruth
Tuesday, 1 July 2014
Modern Irish {Scrappy} Bee: July's Blocks
I can’t believe it’s July already and my turn to be Queen Bee. This is the first time I have taken part in a Bee so I thought by picking July I would have plenty of time to be organised. Then the universe laughed and laughed, and here I am the night before holidays knee deep in packing writing my first ever blog post. I have really enjoyed making all the different blocks and trying new patterns for the ladies so far this year. There are going to be some spectacular quilts! My pile of scraps doesn’t appear to be getting very much smaller though the list of quilts I want to make is getting longer….. I have changed my mind so many times about which block I would like but finally chose this one. It’s pretty simple as blocks go but I love the effect. I would like you each to make eight 6.5 inch square (unfinished) string blocks. This tutorial by Sherri McConnell is very easy to follow (though note she works off a larger block size). Once you have your strings prepared they only take minutes to put together. In keeping with our scrappy theme these can be as colourful and scrappy as you like. The only stipulation I have is that the centre strip is a happy colourful selvedge. I hope you have some lying around. I’m not a huge fan of batiks and civil war type colours but other than that anything goes. Linen mixes etc are fine. If you want to add other selvedge strips into the block too that’s cool as well.
Your foundation fabric can be any scrap cotton fabric you have as it won't be seen. I used part of a sheet I had cut up for another project.
I found it helpful to start by drawing a line down the centre diagonal of the foundation block, then another ¼ inch from the centre line. It's quite faint but it's there in the photo. Or you can live on the wild side and wing it- it's that kind of block.
I lined the edge of my selvedge strip along this line as my starting point.
Then just keep adding strings as shown in the tutorial. Press and trim.
And there you have it- a nice summer evening project.
-Fiona
Monday, 23 June 2014
Exploring Log Cabin Blocks
One of the topics we thought we could look at for our blog is an exploration of traditional blocks and a modern use of them. My very first pieced block (other than sewing charm squares together!) was a log cabin block.
I made this as part of an online sampler course with Whipstitch. It is still one of my favourites though at the time I didn't find it that easy. This 15" block required long straight seams with a consistent 1/4" and getting the colours placed in the right order. I have since learned that pesky 1/4"seam and discovered, when you want a straight line ram rod straight, foundation paper piecing is a good way to do this!
It is a good block to start with from a quilting history perspective and makes you feel connected to a long tradition of patchwork piecing. I learned the light and dark represents the ups and downs in life and the that the traditional log cabin has red or yellow at the centre to symbolise the hearth of the house and the warm welcome that awaits you there.
This traditional block can look equally good breaking a few rules. Here are some variations:
With one side of the block usually made from light and the other dark, you get great contrast when multiple blocks are put together. Using this colour placement gives rise to many settings. Check out these links from Piecemeal quilts and Connecting threads to see some combinations and the wonderful names they've been given, like Fields and Furrows and Streak of Lightning!
I went a bit mad with this one and varied the thickness of the strips (I also ran out of the first purple and chanced my arm with a second!)
Film in the Fridge has a great tutorial for a really modern looking block using the courthouse steps principal, called Converging Corners, that is worth a look.
I put all the lights on at the same time instead of going around. Still it's a happy accident, make 3 more and you have a Bento box block! Fine Diving has some really colourful Bento box examples here.
Combining some of these concepts all together take a look at this wonderful quilt top Jody made for our Modern Medallion-A-Long.
If you have any log cabin variations to share please add them in the Flickr group or Facebook page. If you are sharing on Instagram please tag with #modernirishquilters so we can find them. We'd love to see your log cabin projects or any other variation of a traditional block!
-Ruth
 |
| Forgive the wonky angle, taking photos of quilts in the wind is tricky! |
This traditional block can look equally good breaking a few rules. Here are some variations:
- Coloured or fussy cut centre.
- Instead of light and dark though how about this spiral version using only 2 colours.
- Varying the width of the strips surrounding the centre gives a really nice offset effect too.
- And this one based on the courthouse steps version of the block, which is made building the blocks 2 sides at a time.
- Half log cabin though in my head this is more of a quarter. Some people call it a Chevron block. My first time making a log cabin I inadvertently ended up with one of these.
- How about Wonky? Anna our May Queen for the Modern Irish Bee chose a wonky log cabin style block for her month and the instructions and tutorials links to make this are here on our Blog page.
- And lastly you could apply the same principle to a shape other than a square. How about a triangle or even an octagon? There's a link to a hexagon tutorial on our Facebook page if you want to try it out.
 |
| Used with permission from Jody |
-Ruth
Monday, 2 June 2014
Modern Irish {Scrappy} Bee: June Block
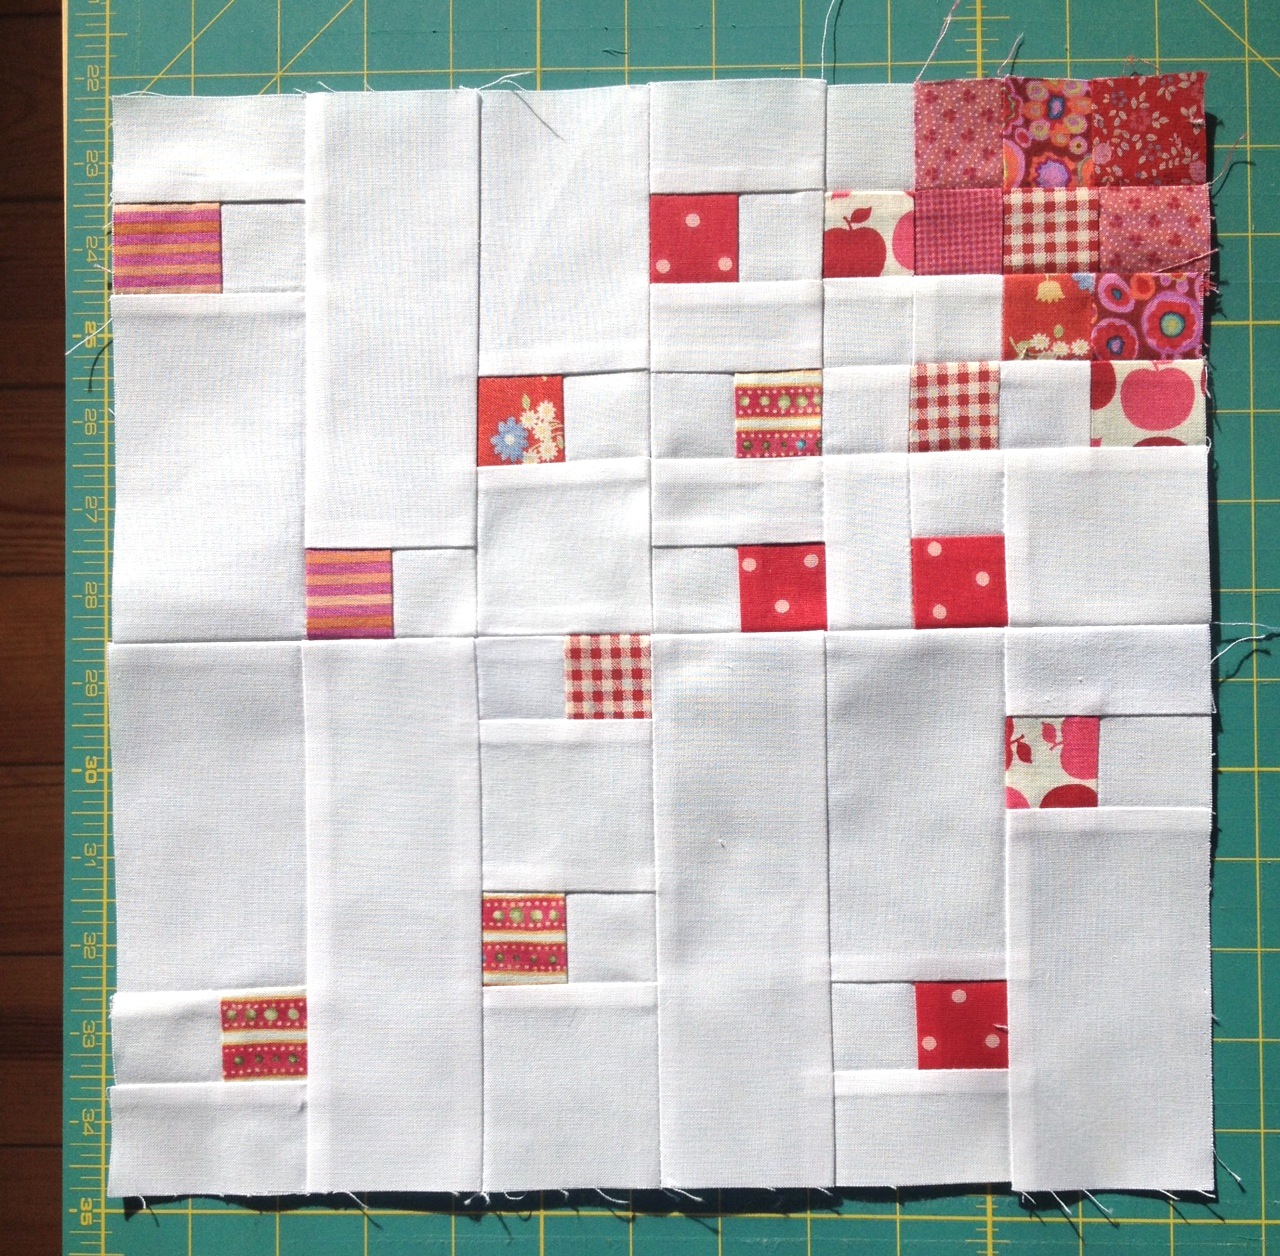
And it's June already! If you knew how many times I've been changing my mind with my block design… But I must thank Cindy who gave me the little push I needed to stick to my original plan. This is how it happened: back in January I started to look around Google Images for inspiration on "modern quilts", I looked through all my quilting books and magazines, admired the most amazing scrappy blocks and quilts on other blogs… and then I saw one that caught my eye on Flickr, this "Confetti Quilt" had what I was aiming for. All those bits of scraps scattered randomly on a plain background.


"Confetti quilt" by Threekitchenfairies
The second round of inspiration came when I was flicking through a book about the Solar System and saw photos of Supernova Stars. Something more or less like this:

photo from wyalusing.org
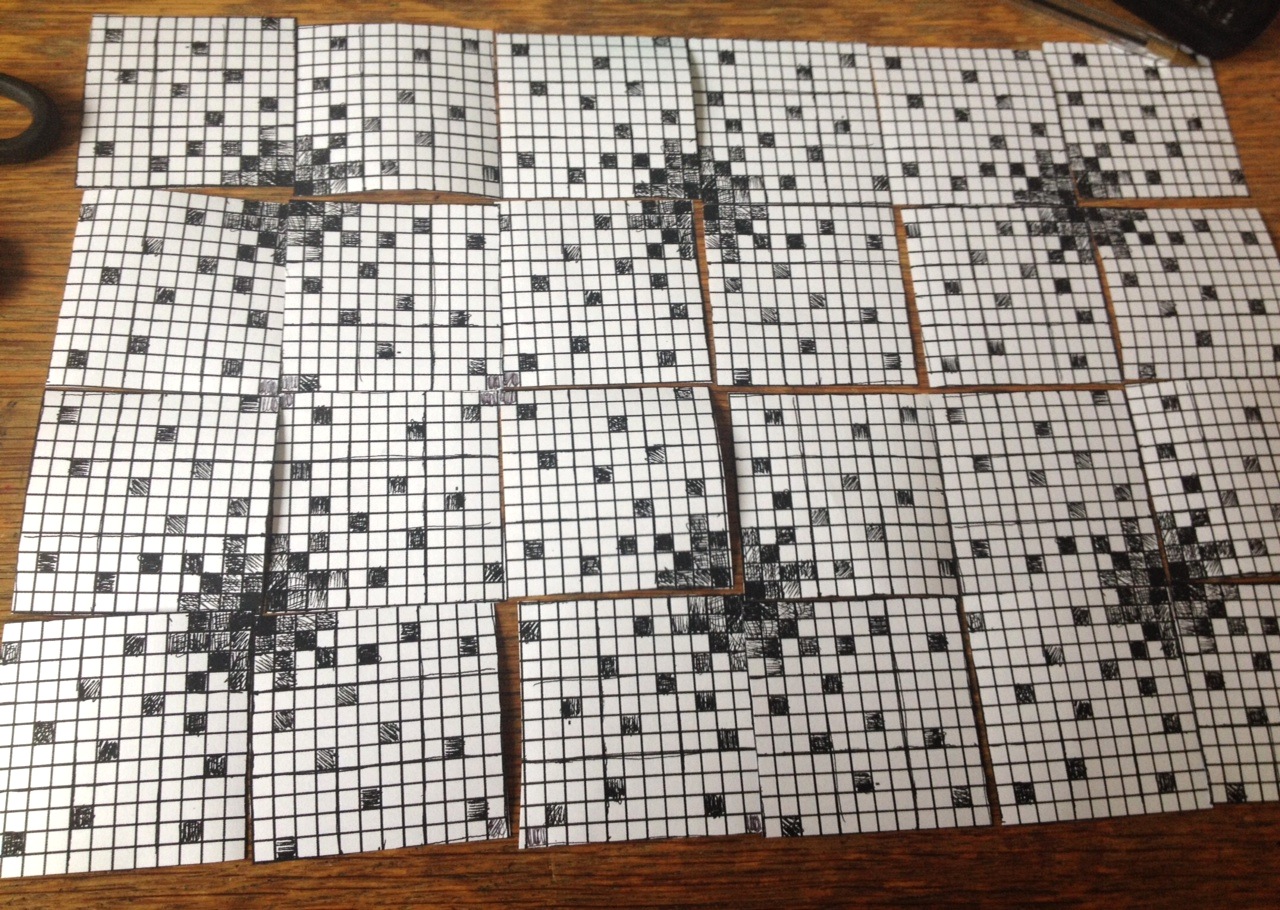
So that's when I started to sketch some blocks on graph paper until I came up with a block that had random patches like the confetti quilt and a become a Supernova star cluster when pieced together with three more blocks. I imagine my quilt like this:
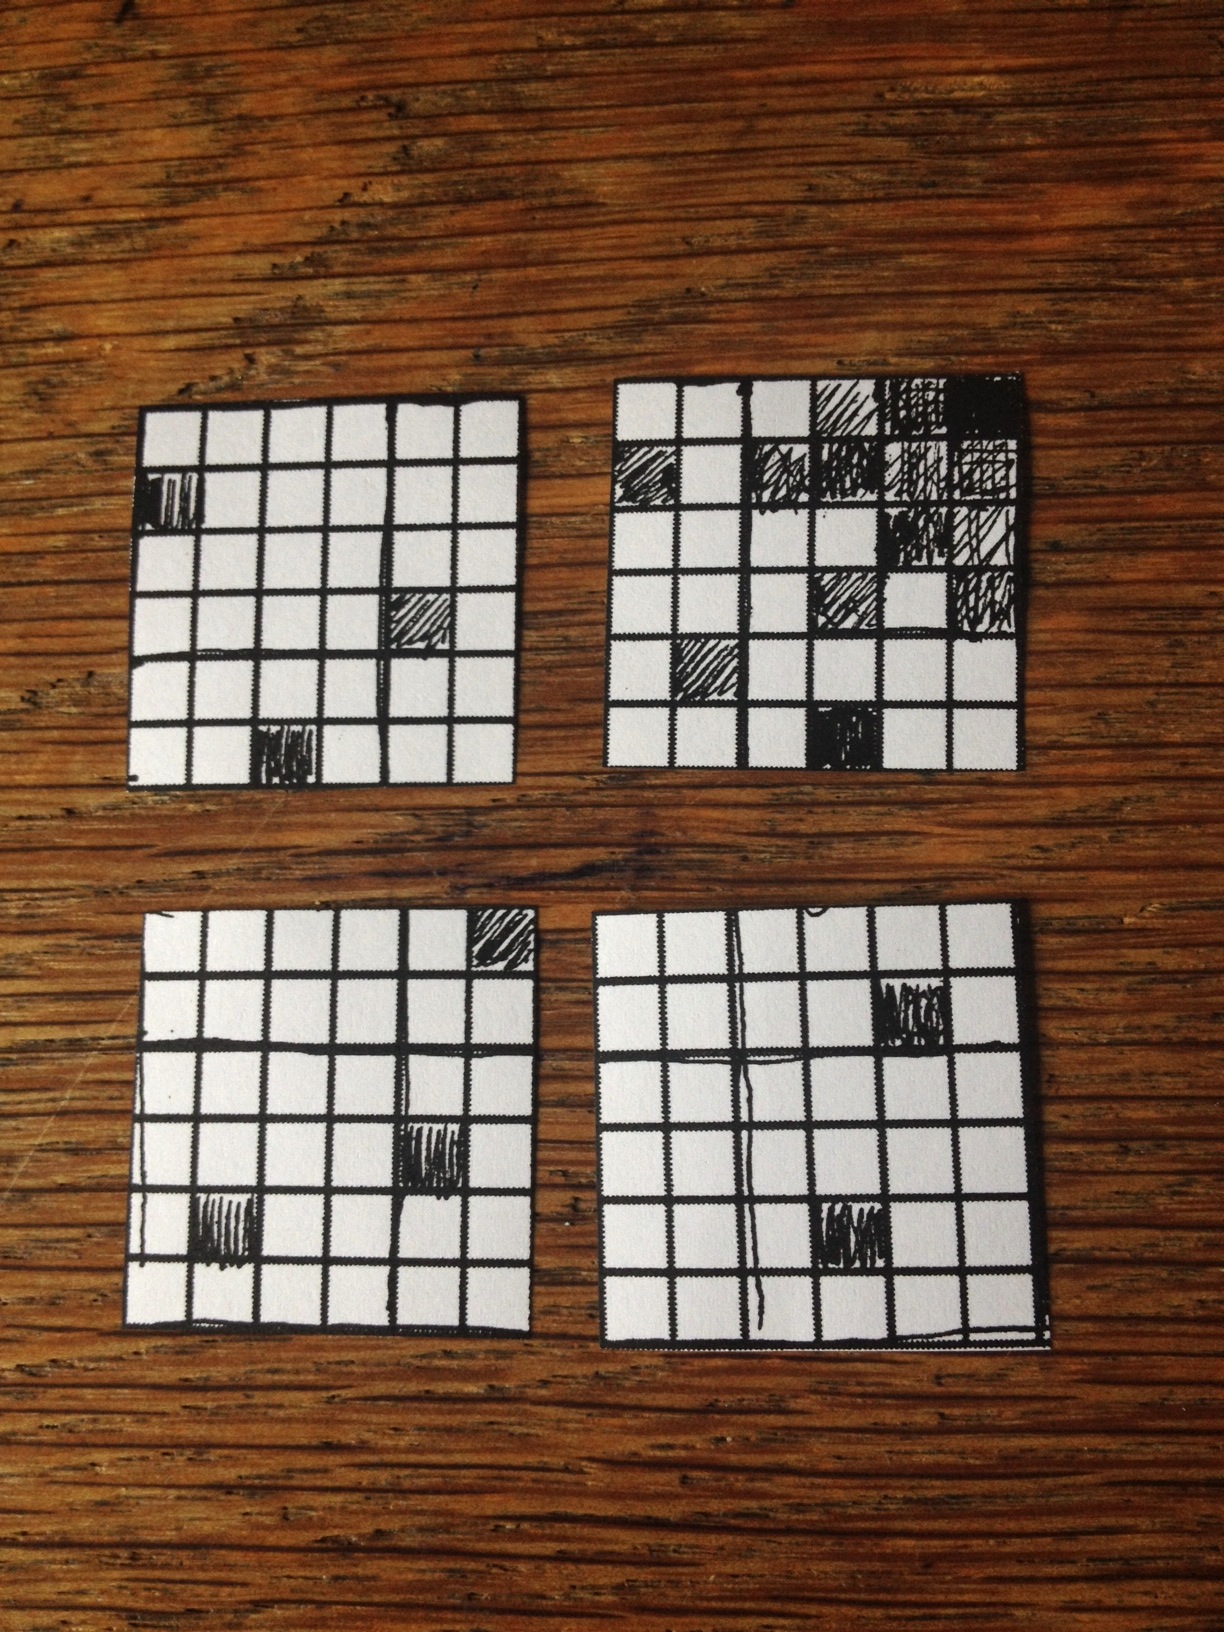
Please don't panic! (that's why I changed my mind so many times, I was afraid it would be too complicated!). But I've managed to simplify the pattern. If you look closely, the block is divided into four squares, and each square can be divided in 3 columns…
Here's the two blocks I've made, which would be half a star…:

It requires a bit of organisation when cutting, especially the white background, but once you have everything ready, the instructions are pretty straight forward. I'd say it takes about an hour to make one block, but I will ask you for 2 hours of your precious time to make two of them, please don't kill me…
I would like you to use Kona white for the background and a range of red scraps (light, medium, dark), you can include a bit of pink and burgundy, but the main colour is red. One or two dark squares placed at the corner, where the centre of the star would be and the rest can spread out between medium and light. I don't mind if they have a hint of white or any other colour as long as it doesn't take over, since the squares are only 1".
I have written the instructions in PDF format, there are 5 pages but that's because the diagrams (tables really) take up most of the space. I so wish I could use a proper software for writing quilt patterns! but I'm hopeless with computers…
I hope you like it. There is no rush at all and I'll be happy to help if you have any questions. Thank you!
Subscribe to:
Posts (Atom)

